Dee’s Simple Stove Top Decarboxylation
When Rambo published his Sous Vide Decarboxylization article we got a lot of comments. It made use (or possibly misuse) of a lesser known kitchen appliance. This sous vide water heater thingy also called an immersion circulator suited the needs of Rambo’s experiment perfectly and gave very exact control over temperature and heat exposure duration. That said, not everyone has one of these handy gadgets in their Cuisinart cabinet. If you do want one you can order yours at this link.
This is where one of our readers steps in. Dee, a Michigan State resident, Vietnam veteran, and medicinal marijuana patient emailed us his stove top decarboxylation method. Dee’s approach uses common kitchen items and a good helping of stone age technology. His process is outlined below.
Tools and Equipment Required
- Half pint canning jars, Mason or Ball brand preferred
- 15 grams leaf, flower or kief for each jar to undergo heat treatment
- Kitchen colander
- Large canning kettle
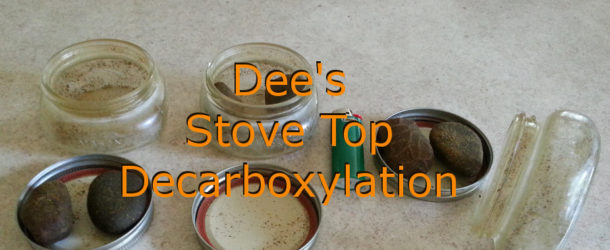
- A few smooth stones weighing between 130 to 200 grams per jar
Cannabis Preparation
Cannabis should be dried to an extreme degree. Dry to the point where it can be ground into a fine dust between thumb and forefinger. Cannabis should then be sifted using the kitchen colander. This assures that no undesired seed or stem makes it into the process. Very dry flowers should be easy to grind into a dust which can pass through the colander holes.
Jar Preparation
After the marijuana is prepared, Dee places around 15 grams in each jar. The jars could certainly hold more but he leaves room for the ballast rocks. Each jar should also receive a few hundred grams of pebbles to weight them down. The stones serve two purposes. They provide weight to keep the jars from floating around or tipping over and they help radiate the heat evenly within the jar much like a pizza stone. After the jars are filled with flower and stones, the lids should be screwed on tightly to assure a watertight seal
Boil
If you know anything about home canning, then you know how to boil jars. You may even own some of the specialized canning tongs or canning racks that fit inside your canning kettle. If not, that’s fine as well.
Arrange the jars in your canning kettle with their lids facing up. Fill the pot with hot tap water and place over high heat. After boiling has been achieved set your kitchen timer for 2 hours.
Dee stresses the importance of the 2 hour bath, he doesn’t have lab results to validate the importance of this duration but he does have years of experience using this method.
Note: Cold jars can be immersed into hot water but NOT boiling water, please use common sense here!
Let Cool
After 2 hours, Dee removes the jars from the canning kettle and allows them to dry and cool enough to handle. After they cool enough he removes the stones from the jars to prevent further heat exposure to the product. The decarboxylated cannabis can be brushed from the stones, but use caution, the stones will hold heat longer than the glass.
Enjoy
Your freshly decarboxylated marijuana can now be added to your favorite recipes. Dee mentions adding this material to drinks like coffee and tea, however he also offers a caution stating that a little goes a long way.
With any luck you aspiring marijuana alchemists can locate the items needed for this process in your own kitchen and make use of Dee’s method. We think Dee’s method is a great hack and hope you will too. Happy canning!
Dee’s Simple Stove Top Decarboxylation,


Hi all.
Just wanted to say that if anyone has any questions about this decarb process, hit me up, I will be more than happy to help.
Dee
ps…, preheating the water works better, and 130g to 200g of ballast is way plenty.
Enjoy 🙂