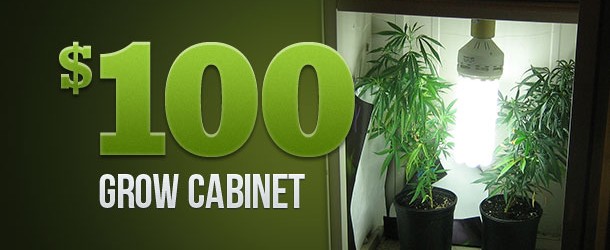
As medicinal and recreational use of cannabis becomes more widely accepted, many cannabis users are choosing to grow their own. For those who can grow outside this is easy enough, but if your only option is to grow indoor, setting up a grow room can seem a complicated and expensive undertaking. I am going to show you how to build your own mini grow room for under $100. This grow cabinet can be assembled in minutes from common items you can discreetly purchase online and at your local walmart.
This $100 grow cabinet is perfect for those who want to grow for personal use and have limited space or a limited budget. You won’t be growing monster plants or harvesting tons of marijuana, but if used correctly, you can harvest enough for personal use and have fresh high quality herb every few months.
At Marijuana Growers Headquarters you usually see us going big. I’m not going to say don’t try that at home, but here are some real advantages to keeping it small.
- Low overhead means you can harvest good cannabis with very little start up cost.
- Negligible increase in energy use means no suspicious spike in your utility bill.
- Low maintenance, plus you can easily spot problems before they get out of hand
- You won’t harvest so much you are tempted to sell it and risk getting in trouble.
I designed this small cabinet grow room for making feminized seeds from my favorite mothers but the design worked so well I had to share it. For those wanting a simple, affordable and effective mini indoor grow room I can’t think up an easier solution.
Grow Cabinet
I wanted a grow cabinet that could be easily moved, easily cleaned and because I’m hard on things, durable. I found a plastic Sterilite 2 Shelf Storage Cabinet at Walmart for $44 that fit all of my needs. It was inexpensive, light weight, strong, and easy to assemble. The plastic was soft enough that I could use a pocket knife to cut holes where needed. I wouldn’t have to worry about water damaging the cabinet if I over watered or got a little out of control while foliar feeding the plants. Plastic is also less likely to grow mold and can be easily sterilized with a little bleach and water in a spray bottle.
The cabinet I chose measures 35-¾†tall, 19†deep and 25-¾†wide. It just snaps together and requires no tools to assemble. I used one of the shelves to mount my light and still have space to store some tools at nutrients. The seconds shelf was not needed so it went in the garage with my other treasures.
Grow Light
I have seen growers use multiple household compact fluorescent lights in grow cabinets but combining multiple outlets and all those tangled cords seemed like a nuisance. I have been eyeballing those big CFL’s at the growshops for some time and this was my excuse to try one. I purchased my 125 watt CFL from a nearby grow shop but you can buy them on amazon just as easily. These lights require a Mogul Socket and won’t fit in a normal lamp. Most mogul sockets are made to hook up to a ballast but I was able to find them online already wired with a 120 volt plug.
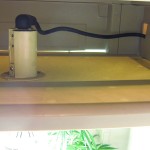
 I cut a hole in the top shelf just big enough for the socket of the light to fit through. I then set the shelf at the highest possible position so the plants would have as much room as possible to grow. I cut a hole in the side of the cabinet above the self to run the cord through. If I was a bit smarter I could have done this before wiring the plug and made a much smaller hole. I plugged the cord into a inexpensive but reliable timer and this little grow cabinet had light.
Ventilation
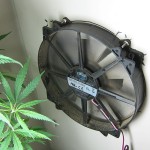
 Even though CLF’s run pretty cool they do produce enough heat that a small space can get warm pretty quick. In addition to controlling heat, a little airflow is always required to replenish depleted CO2 levels. I wanted my airflow to be quiet, reliable and affordable . This 120mm computer fan I found on amazon delivers on all counts. With a pocket knife I cut a hole in the wall of the cabinet a little smaller than the fan. I drilled some small holes with a cordless drill and bolted the fan to the inside of the cabinet. Because the computer fan is 12 volt, I had to find AC to DC adapter that would work with the fan plug. Once complete, I plugged it in and my little grow room had ventilation. I live in an area where it is usually on the warm side so I leave the fan on 24/7.
So there we have it, a grow room with light and ventilation in about an hour of assembly time. Lets add it all up and see where we stand.
Cabinet $44.08
125 Watt CLF $24.99
Mogul Socket $10
Timer $7
Computer Fan 12.96
Total $99.03
By the skin of my teeth as usual, but a perfectly functional grow cabinet for under $100. If I can build it, so can you. Go get some clones or seeds and get to growing.
Remember to switch your plants to a flowering light cycle before they get too big. If you let them get any taller than about 8 to 10 inches before switching I suspect you will have height problems before they are done flowering. Sticking to indica dominant hybrids will help since they don’t usually grow as much vertically once they begin to flower. Going with a shallower but wider pot will help give you a few extra inches of headroom as well.
I hope this design is simple enough to get you off your duff and growing your own cannabis. It can be a fun and rewarding project, and who knows, maybe you’ll find you have a green thumb after all. If you need assistance, please feel free to ask.
The $100 Grow Cabinet,


There is an error in this article. In order to run a 12 VDC fan using house current, a 120 VAC to 12 VDC adapter is required. The “DC to AC converter” the author mentions is the exact opposite of what is required.
Thank you for the correction.
This is Awesome ™. Please, would you post more pictures of the finished cabinet, several angles and an coup[le of outside shots of it closed (stealth mode).
Thanks for the inspiration.
With the fan running and as the plants grow, does the room begin to smell of cannabis?
Do you have any pics of the finished cabinet?
I like this idea. Where would any intake and exhaust fans be placed?
Thanx
I had some questions about this grow cabinet and was going to ask in forum BUT the register link just goes to a blank white page. Would really like to ask some questions for my 2nd grow. I pretty much know my mistakes of my first grow.
First of all I love the use of vertical light. Way to go! This is both simpler, cheaper, and yields better than horizontal hoods.
One question posed is will this setup smell. IME that will depend a lot on so many factors the question is really unanswerable. The answer is that this little setup COULD raise quite the stink depending on the plant (genetics) and how the grower takes care of it. It wouldn’t take much to mitigate the stank from such a little cabinet though. The thing with smell is to have someone who isn’t living with the box come over and have a sniff late flowering. Tell them you smell something funny maybe the neighbors or a skunk or something and you want to know if you’re crazy or not. Your nose will be too used to it by then and better growers than you or I have been shut down by the smell!
Another question was about the exhaust fan position. Position the exhaust fan as high up on the cab as possible, and the intake as low as possible. A bit of window screen glued onto a cut hole in the cab will do just fine on a budget. The air the exhaust is pulling OUT has to come from somewhere AKA you need an intake or you’ll pull through the cracks in the cab not very efficient.
About the exhaust fan. If sound is not a big issue for $26 dollars shipped (Amazon – LEDwholesalers) you can have yourself an excellent exhaust fan that will control the heat in this cab and leave room for expansion. Depending on the DC adapter used – not needed for this fan – your cost will be nearly the same. Just search 6″ inline fan you’ll find em. They are very reliable I’ve had dozens hooked up to my dry tents running continiously for years and years. These are a bit quieter than a box fan on medium, not bad.
First let me say I’m not slamming this cab at all, in fact I’ve set up very low income patients with a similar cab.
But you should be aware…
That these energy saving awesome lights will not burn off plant sugars (carbs) needed to make top shelf bud mid to late flower. I have confirmed this with a Brix Meter. My smoke tests reveal the same, I’m sure lab tests would be consistent with my findings. It is what it is. 250W mH veg to 250W hps, hung vertically, WILL get you dispensary grade buds if the rest of the grow is proper. This will also push you over the $100 mark and require more ventilation… But with thrifty shopping you CAN have high grade buds at home for you (and your bro?) for under 250. For ventilation the fan I mentioned above will get the job done. With the upgrades you’ll spend another 100 or so due to the light and you’d be looking at running 300W total or so due to ballast inefficiencies, but well below suspicious levels.
Lastly. For any new grower it’s important to mention lighting spectra. I stepped into this one accidentally by purchasing the wrong spectra mH for veg – woah, big difference!
Your best for single source lighting is to mimic daylight (6500K) in veg and 2700K in flower. If you can only afford ONE bulb NOT TWO, I’d go with a 4100K. A “K” is a Kelvin and the numbers given are approximate.
This is all very interesting and informative. I’m a beginner and am still gathering information. I’ve ordered some seeds and want to get all the knowledge I can before I start my first grow.
shadowman – where did you purchase seeds?
Has anyone posted a comment about how this product worked for them? And if so, what did they have to say about it? And if it put out more buds the other way of grow? Oh and I would like to say I love this site!!! Love,peace and chicken Greese !!!€
Great read… I appreciated it! I’m just getting ready to grow for the first time. I written many notes off your site.
Thank you!!!
Matt
Try actually posting a picture with each step. Pictures are worth 1000 words. A lot more when it comes to this kind of stuff.
I really appreciate all these posts. We are all after the same results here. I have a closet set up with CFLS and LEDS which are more than sufficient for my personal medicinal needs. Averages about 3500k. As for stealth, we are quite secluded on 10+ acres in the country. New crop going into flowering stage and outside crop will harvest in late fall. Year round production is the goal. I can’t emphasize enough the PH of your water and using filtered water and letting it sit 24-48 hours to eliminate extra chlorine, Tap water is a no-no as is any off the shelf nutrient. Prefer Dyna gro for foliage and flowering. These nutrients will change the PH so I would suggest checking the PH again AFTER nutrients are added and then adjusting the PH if need be. Fox Farm soil n the best with bat guava and worm casings. Smart pots are excellent. Small fan and opening closet doors a few hours each day eliminates the excess carbon dioxide or need or exhaust fan. My girls like music and like to be talked to and encouraged. Silly maybe, but to each his/her own. Sorry for the rant, just had 2 cents to offer and a million worth of thanks to this site and all those that post. Peace and two to you too.
This is to Anet…Just wondering if opening the cab doors once in awhile during flowering has a bad effect on your flowering plants?…Thanks!
I’m a begginer and I love all the good info what about smell in a basement closet
The article plus most of the post are going to be real helpful to me. I have already built a cab in my head with materials on hand and this helps. I am very concerned about the lighting spectra and those “sugars” that may not burn off. I have a lady at this time who began life from the very start and most of her life growing seed, veg to flower beginning with CFL spirals at 100w equiv, 5000k, 1600 lumen (12 of them) all in a 6 sq ft area and it was growing like it came from another planet! Inches over night! This was in straight potting soil, gen fertilizer (24-8-16) and water. Then I began to study J. Cervantes and others and began to adjust over to a more favorable enviro for flowering.
Went to 3500k bulbs, increased the count to 22 and started giving it the flowering/blooming fertilizer (15-30-15). Not exactly what is best but I saw in several places this is OK for good to very production.
However, I have noticed a distinct drop off over the past 4 week or so the buds have stopped growing and the stickiness is less as is the smell. I know they are maturing but it seems that they like the “Daylight” type of bulb at 5000k more than the more “red” 2300 or 3500 k lamps.
In a grow cab I wondered if it would be possible to build in several rows of standard screw in sockets (maybe vertically down each corner and a double row on the top. That way a person could just wire it in such a way to have a switch for veg, one for flower: lighting the sockets with whatever temp lamp you need. I am having small heat issues in my small totally open closet with AC and fans. Wouldn’t just a single CFL let alone the multi bulb rig I described make more heat than a fan can handle?
My experience that the room will rapidly heat up with a constant heat source and it gets hard to even keep the room cool so the intake air ceases to be cooling and the heat builds up. I can get my area no cooler that 78.5 and it’s wide open with one big blowing fan and 2 small exhausts just to move hot top air.
What “heat” experiences does anyone have to share?
Tanks much all!
Ed
I don’t recommend the small CFL bulbs. This big one is best. Multiple lights do increase heat. Depending on your room or cabinet, you will need to increase fans. Also, if the air you are intaking is 80*, it won’t cool ur room any more then that.
Excellent post. I was checking constantly this blog and I am impressed!
Very useful info particularly the last part 🙂 I care for such information a lot.
I was seeking this certain information for a very long
time. Thank you and good luck.
Looking at this it seems like a great idea. I have two questions that I don’t think have been addressed.
With the big bulb, would the suggestion be to move the container around to give different light exposures to the growing plant? It seems to me that the bulb would take a lot of vertical space in the middle of the container.
Also, what would be a way to light shield the container itself? The plastic looks like it would let much light through, especially the big CFL as recommended.
Love to hear any suggestions.
You can line the inside with panda plastic or Mylar. Or I have seen people cover their cabinet with a blanket to hide the light.
You can rotate the plants inside to help them get equal light coverage.
I just built this and it’s sitting next to my desk. Thanks for the cool instructions they were spot on. I’m running out of money at the moment so I used what was around for the light. I’m not concerned about stealth so that influenced my design.
What I did was cut a hole in the top and glued on one of those clip on shop lights (http://www.amazon.com/gp/product/B000HHQ94C/&tag=margrohq-20) after taking the clip off. I put a pretty bright plant light in there a long time ago so I can’t remember what it is but that shouldn’t be difficult to find.
Careful when cutting the holes please! It would have been so easy for me to slip and hurt my hand badly.
Anyway I did cut the holes with a large camp knife that’s very sharp. Even so it took some work. I’ve got a pair of fans in there because I found these for a good price: http://www.amazon.com/AC-Infinity-AI-MPF80A2-Receiver-Playstation/dp/B00IJ2J2K0/?tag=margrohq-20 They are running now and they are completely silent.
Then I cut up one of those Mylar (shiny silver) blankets and taped it around the inside and on the doors. They don’t cost anything and they’re very easy to find.
There you go. I really appreciate this tutorial, it gave me good steps to follow.
$99.03. I am so impressed. Thx